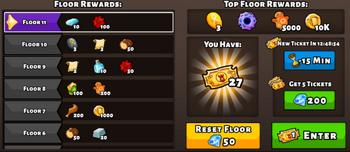
The Wizard Tower is a PvE game mode that becomes available at keeper level 9. It requires Wizard Tower Tickets to access.
Overview[]

The Wizard Tower consists of 30 regular floors and 1 boss floor, with each floor containing a randomly generated set of monsters according to the player's level (although never higher than level 65). Defeating a floor grants combat rewards, in addition to special rewards from the tower. The player "climbs" the tower by beating successive floors, with their current floor being saved until the Wizard Tower resets.
The Wizard Tower resets every 4 weeks, and a small subset of the rewards (items and training/artisan points) for each floor are changed on reset. The player's current progress and monsters on each floor will also be reset at this time. Defeating the boss floor similarly resets the player to the first floor, although the rewards stay the same.
Participating in the Wizard Tower[]
- Rewards from any other game content
- Purchased in the Wizard tower at 5 tickets for 200 gems.
- 1 ticket per 24 hours is generated automatically, according to when the player logs in (similar to the hero shop).
Notably, the Wizard Tower does not give the player any exp, nor does it cost food, to access. This makes it ideal for players looking to gain more resources without leveling up. A single void core is also available at floor 30.
Floor Mechanics[]
Floors will have between 2 and 6 monsters, with levels and type scaled according to the player's level. The difficulty however is random. The tower is designed so that every few floors stalls the player's progress and forces several tickets from them.
A tower floor does not reset in between battles. Any enemies killed stay dead; any damage dealt to their health remains. Their level is also constant. A low-level player can struggle on a high-level floor, then gain 5-10 levels before the tower resets and return to beat the floor.
A floor may be reset for the price of 50 gems. This can be useful against a particularly tough floor, but keep in mind the difficulty itself will not reset. So for example resetting a floor with 3 level 65 monsters might just give you another floor with level 65 monsters; however, the types of monsters might be more favorable (ex. not 2 damage dealers + tank with taunt in front).
Every floor has a time limit of 300, like in tower attacks.
The difficulty curve is extremely imbalanced. Because monsters cap out at level 65 and monster types plateau as well, the regular floors eventually become trivial affairs, and are mostly a complication only under level 30-35. The only potential difficulty in the Wizard Tower for higher-level players is the final floor where the boss resides.
Floor 31[]
The 31st floor contains the Wizard boss, along with 3 random monsters arrayed in front of him (all enemies are 10 levels higher than your keeper level). The floor in fact consists of 9 spaces, and the boss will continually summon allies into the other 8 spaces as long as they're unoccupied.
Like any other floor, progress is saved between fights, and importantly any stat buffs are also removed. Keep in mind however that saved progress includes monsters summoned by the boss, which if you're falling behind can stack up to be more monsters than the floor originally began with.

red wizard boss
A boss is designated by its color, of which there are 3:
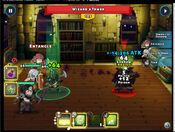
Black Wizard Boss with broken attack (negative)
- Red – insanely broken damage (ranged and AoE). Summons Lesser Demons. Has a superpowered Spark move, in addition to a standard one.
- Black – powerful DoT attacks (both ranged and melee); gains a % of his current attack each time he takes damage (capped at 32767, bugged to go negative afterward, see picture). Casts Dark Mist and summons Lesser Demons. Has a superpowered Curse of Agony.
- Video showcasing this bug: https://www.youtube.com/watch?v=b5aaJAlij-c
- Blue – Has Frost Bolt, Lightning Bolt, and Energy Drain. Energy drain is not the necromancer soul skill, but rather Shikar's move, acting as a temporary, massive self-buff on attack and massive debuff to the target. He recruits Vicious Orcs at half his level. He also has the freezing aura passive, as noted by the debuff icon in the picture. Sometimes referred to as the purple boss. Has no fire resistance, so fire based attacks attacks like Valkyrie's Melt Armor are effective against this boss. Has a superpowered Frost Bolt.
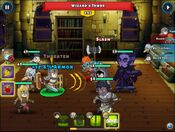
Blue/purple wizard boss
All bosses have staggeringly high health, armor, resists, defense, and attack stats. All damage is elemental. Each color has their own extremely damaging move that deals significantly more damage than their other moves.
Beating the 31st floor grants considerable rewards and resets the player's progress to floor 1, where they may climb again with new random encounters.
Resetting the floor for 50 gems removes all summoned creatures and restores 3 new monsters in the front row. Resetting has a chance to change the boss's color, but isn't guaranteed.
Rewards[]
| Floor | Rewards |
|---|---|
| 1 | 1 × |
| 2 | 1 × |
| 3 | 100 × |
| 4 | 2 × |
| 5 | 2 × |
| 6 | 50 × |
| 7 | 200 × |
| 8 | 100 × |
| 9 | 2 × |
| 10 | 3 × |
| 11 | 10 × |
| 12 | 50 × |
| 13 | 10 × |
| 14 | 10 × |
| 15 | 1 × |
| 16 | 3 × |
| 17 | 3 × |
| 18 | 3 × |
| 19 | 20 × |
| 20 | 2 × |
| 21 | 3 × |
| 22 | 1 × |
| 23 | 1 × |
| 24 | 3 × |
| 25 | 20 × |
| 26 | 10 × |
| 27 | 1 Rare Weapon*, 100 × |
| 28 | 3 × |
| 29 | 5 × |
| 30 | 3 × |
| 31 | 50/75/100 × |
*Rare Weapon and Armor sets: (tbc)
**The amount of rewards received from floor 31 depends on Keeper Level. The lowest amount is obtained at levels 1-30, the middle amount at levels 31-40, and the highest amount at levels 41-55.
Boss Strategy[]
With the right strategy, the blue and black bosses can be defeated in 1-3 tries, probably with around ~5 stars and some basic epic gear. Low-level players unable to defeat the boss might need to take a break and gain levels in order to catch up to the boss.
The red boss however requires several tickets for even the best-prepared players, and for many players is actually downright impossible to win against within any reasonable amount of tickets.
For this reason, the red boss is best reset for 50 gems. This may seem steep, but with a reward of 100 gems, you have at least two tries to reset and break even on your gems. There's also the opportunity cost involved with climbing the tower again, gaining all its rewards, as well as potentially facing the boss again with a different color to recoup your lost gems.
Try to also clear the summoned minions as they appear, especially lesser demons, since their Dark Mist skills severely hinder damage output. If you're about to lose, quit manually if you see a monster summon in the skill queue, so you don't have to deal with it on the reattempt.
It's also recommended to play on 1x speed if you have issues winning before the timer runs out.
Blue Boss Teams[]
- Cleric, Knight, Warmaster/Amazon, Barbarian
- The knight will taunt his high-damage attacks away from the rest of your team, while the cleric will keep him and others in the fight. The Barbarian is a popular choice because her Baleful Glare can be stacked several times onto the boss, along with the Knight's Sunder, so that reasonable damage is possible. This can be important in light of the timer.
Black Boss Teams[]
- Cleric, Knight, Warmaster, Barbarian (same as above)
- Druid, Warmaster, Barbarian, Blackguard
- Because the black boss continually stacks % attack, it eventually reaches the attack cap and overflows. Once it overflows, the attack rating will switch from high positive to high negative for subsequent hits, where his attacks will deal double-digit damage only, making him a non-threat and the floor a cakewalk. The druid's entangle slows him, while her invigor along with the Warmaster's Call to Arms increases your party's speed, allowing you to cycle many attacks without the boss able to respond. Be sure to run as many damage skills as possible to squeeze in more hits that bump his attack up (such as Savage Swipe). Ideally, after you finish off his allies and focus him, he will only be able to attack a few times before he is broken.
Red Boss Teams[]
One ticket team, no tier 2s:[]
Barbarian
Samurai Warmaster
Witch
| Hero | Equipment | Skills |
|---|---|---|
| Barbarian | Ambusher's Hacker, Vest of the Flayer/Great Wyrm Hide | Bear's Strength, Leaping Strike, Weapon Throw, Hawk's Speed, Owl's Insight |
| Samurai | Dominator, Chainskin/Dragonscale Armor | Demon Shout, Fearsome Visage, Warrior's Challenge, Great Resolve, Honor Above All |
| Warmaster | Ambusher's Hacker, Chainskin | Battle Fury, Call to Arms, Heavy Bash/Take Charge, Commanding Aura, Shield of Discipline/Shield of Valor |
| Witch | Wand of Swiftness, Coat of Quickening/Shimmering Cloak | Curse, Hex, Refreshing Brew, Coven Mistress, Dark Arts |
The first few turns will be your Samurai enduring damage from the Wizard and your Barbarian beginning to spam Baleful Glare. Samurai is only there for the Demon Shout, so if he dies, it's nothing to worry about. Eventually, Witch will Hex the boss and then Barbarian will wreak havoc with her attacks, supported by Baleful Glare's defense debuff, Warmaster's buffs, and Witch's Curse damage multiplier. With some luck, you should be able to beat the Wizard in one or two tickets.
High stars are recommended for all heroes (7 for commons and 5-6 for the others). If you find that your heroes die too quickly then you may have too little gear and/or stars.
One ticket level 55 strat:[]
Flannel Mess completed it in one ticket, with a team that will probably work on any boss (however: he has all 7* and full epic gear with probably max level/enchants)
Please post how many attempts you need with a red boss team so readers know what to expect, and stars/gear.
Poor man's Team (~ level 40)[]
If you're around level 40 and have the necessary stars and gear, this strategy can defeat the Red Wizard in one or two tickets, depending on your luck or the use of potions.
Thief (7*)
Warmaster (6*) Knight (7*)
Cleric (7*)
| Hero | Equipment | Skills |
|---|---|---|
| Thief | Ambusher's Hacker, Vest of the Flayer | Active: Backstab, Cheap Shot, Flanking Strike
Passive: Concealment, Underhanded |
| Warmaster | Moon Mace, Chain Vestments of Security* | Active: Battle Fury, Call to Arms, Wrathful Strike
Passive: Commanding Aura, Shield of Valor |
| Knight | Perfect Katana, Shell of Protection | Active: Parry, Sunder, Threaten
Passive: Courage, Steadfast |
| Cleric | Moon Mace, Chain Vestments of Security* | Active: Cleanse, Quick Heal, Righteous Call
Passive: Charismatic Leader, Healer |
(*) If available, Chainskin would probably be even better, since it lowers the Cleric's and Warmaster's skill cooldowns, but Chain Vestments of Security works just fine nevertheless. The important thing is to have decent defense levels in order to survive the Wizard's attacks for longer.
The basic idea behind the strategy is fairly simple: clear the monsters in the front row as quickly as possible, then use the Thief's Cheap Shot to stun the Wizard for most of the run and Backstab him into oblivion. The few common-sense things to keep in mind are:
- DO NOT use the Thief's Waylay soul skill after Flanking Strike if his next queued skill is Backstab, because you want the damage bonus from Flanking Strike to be applied to Backstab. If the RNG ends up causing Flanking Strike to be followed by a Cheap Shot, then it might be worthwhile to use Waylay, especially if you're down to the last monster on the frontline, since Waylay might kill it and then the Cheap Shot could target the Wizard himself.
- Use Shield Tactics often, and especially before the Wizard's overpowered Spark skill (if Knight doesn't have Threaten active). If Spark hits your Cleric and gets her killed, you'll probably need either a potion or another ticket in order to succeed.
- As is the generally the case with boss battles, try to play at normal speed, since it will give you more turns during the allotted time, as well as making it easier to coordinate your moves.


